Your First Time Opening GoCards
Let's start in the All Decks tab.

Step 1: Create Your First Deck
Decks are collections of flashcards organized by topic. Let's create your first one:
- Tap the "All Decks" tab at the bottom
- Tap the "+" button in the bottom-right corner
- Enter a name for your deck (e.g., "Spanish Vocabulary", "Biology Terms")
- Tap "Create"
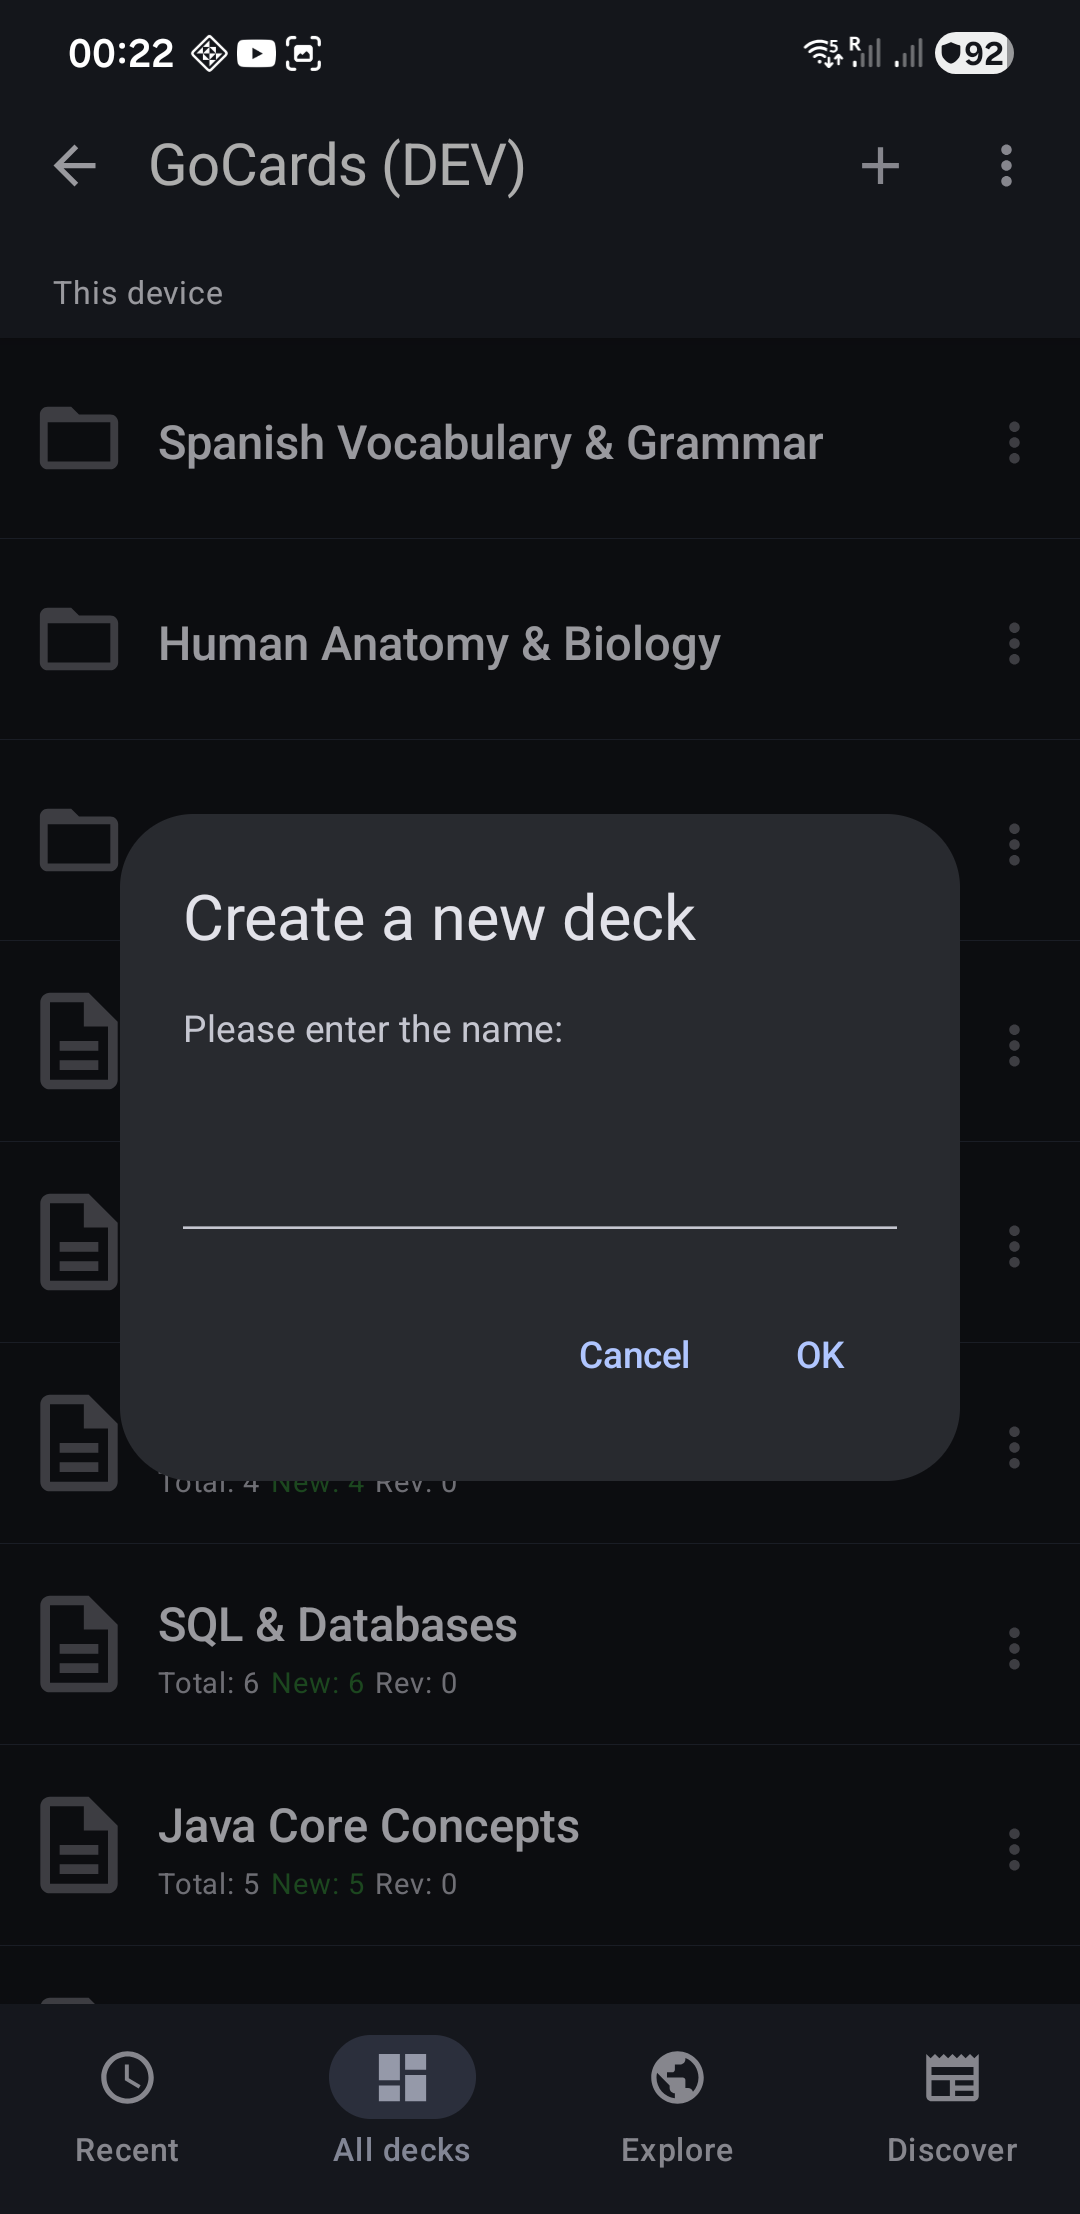
Your new deck now appears in the list!
Step 2: Open the Cards List
The cards list is where you'll manage all the flashcards in your deck:
- Tap "⋮" on a deck to open the deck menu.
- Select "List Cards"
You'll see an empty list since we haven't added any cards yet. Let's fix that!
Step 3: Add Your First Cards
Now let's add some cards to your deck:
- Tap the "+" button in the top-right corner
- Enter the Term (the question - front of the card)
- Enter the Definition (the answer - back of the card)
- Tap the save icon (💾) to save your card
Repeat to add more cards. Later, you can enhance cards with HTML formatting, images, or even YouTube videos.
Step 4: Study Your Cards
Now it's time to start your study session!
- Go back to your deck (tap the back arrow)
- Tap on the deck to enter study mode
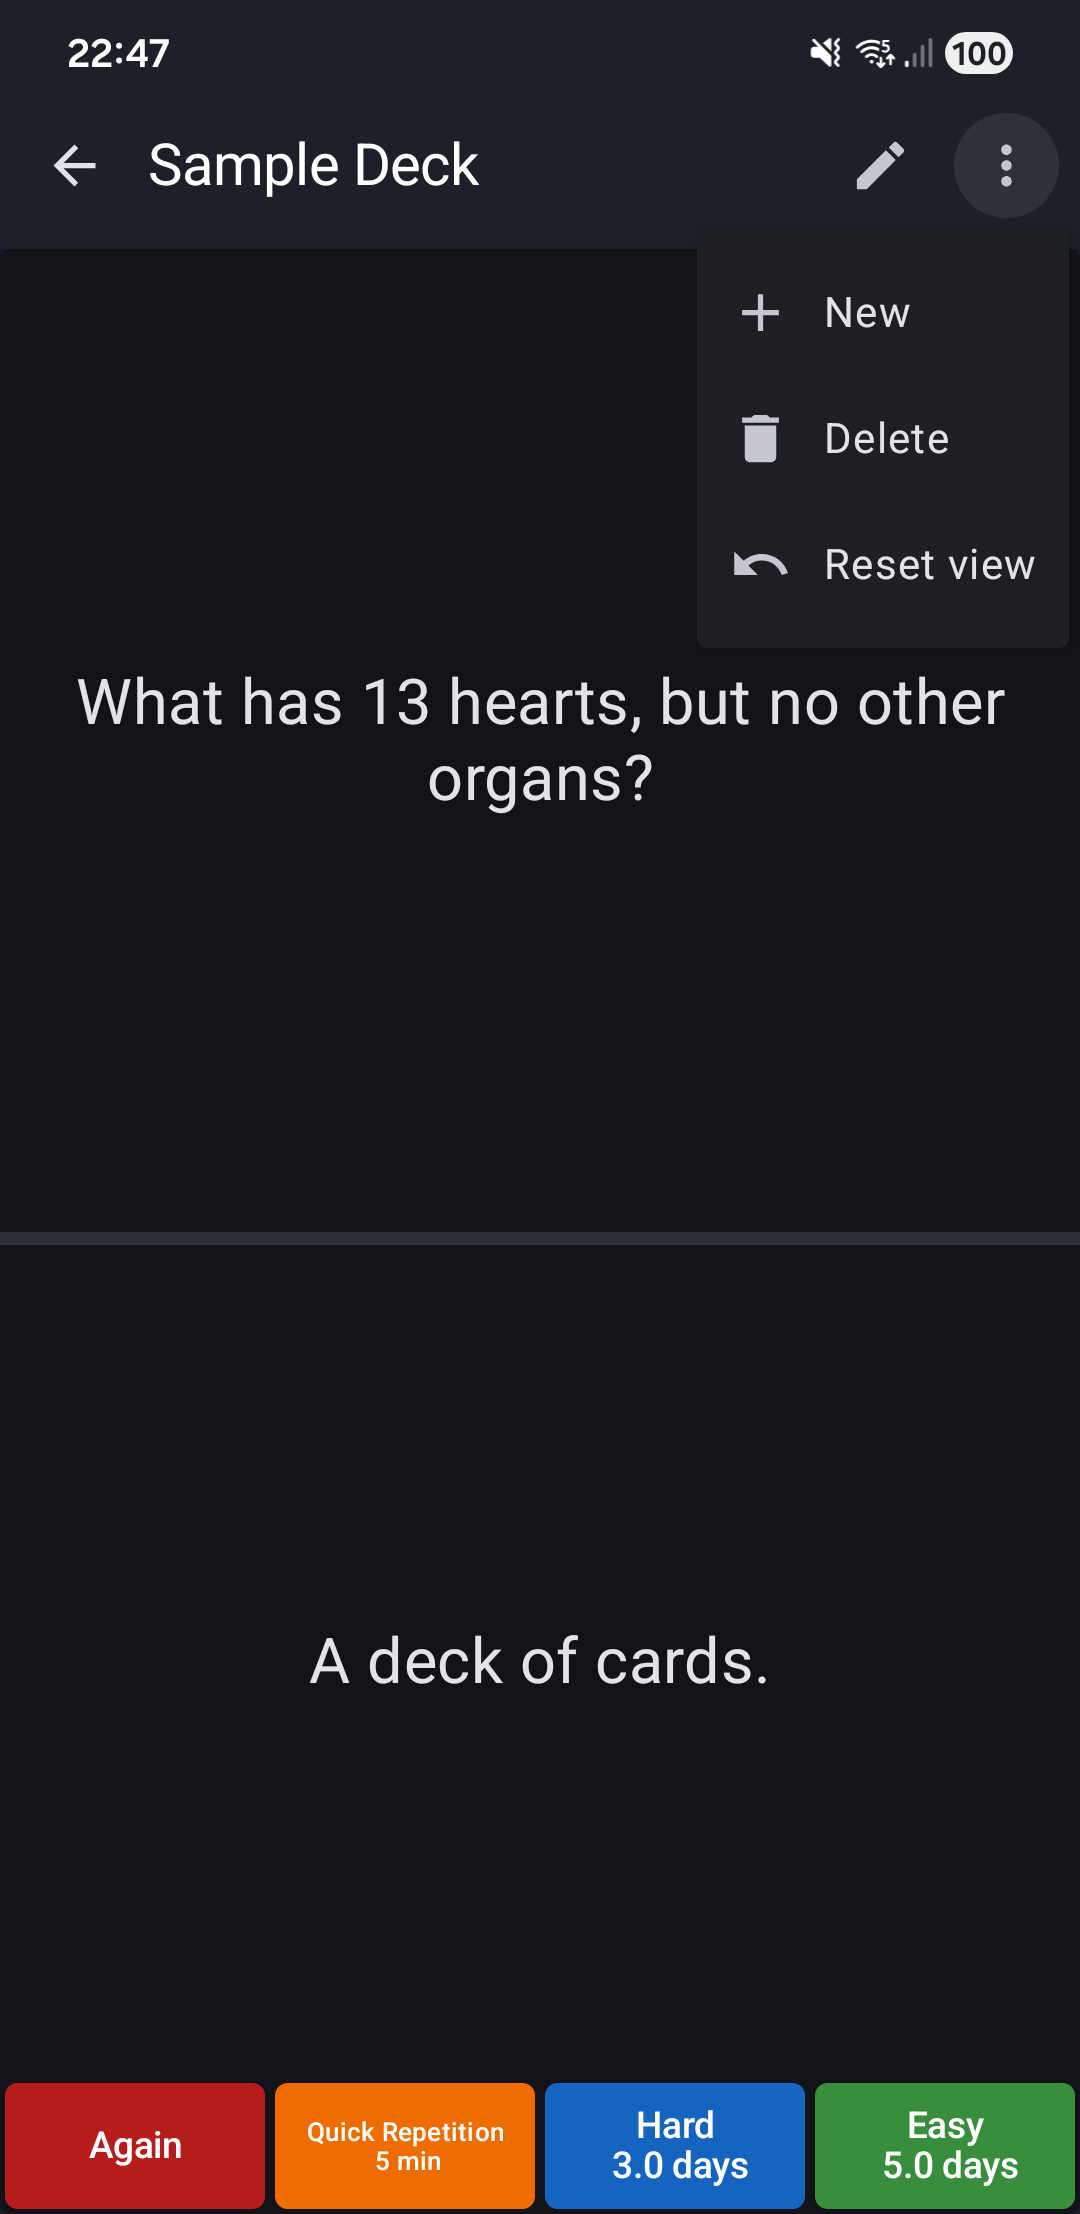
Your First Study Session
In study mode, you'll see:
- Term at the top (the question)
- Tap the bottom section to reveal the definition (answer)
- Swipe left or right to navigate between cards
After revealing the answer, grade yourself based on how well you remembered:
| Button | When to Use | Next Review |
|---|---|---|
| Again (Red) | You forgot | Soon (stays in current session) |
| Quick (Orange) | For cramming | 5 minutes |
| Hard (Blue) | Remembered with difficulty | 3 days |
| Easy (Green) | Remembered easily | 5 days |
Each button shows when you'll see the card again. This is spaced repetition—the app schedules reviews right before you're likely to forget, making learning more efficient. If you prefer to review cards without affecting your study schedule, try Browse Mode.
Next Steps
You've created your first deck and learned the basics! As you continue, you'll want to explore:
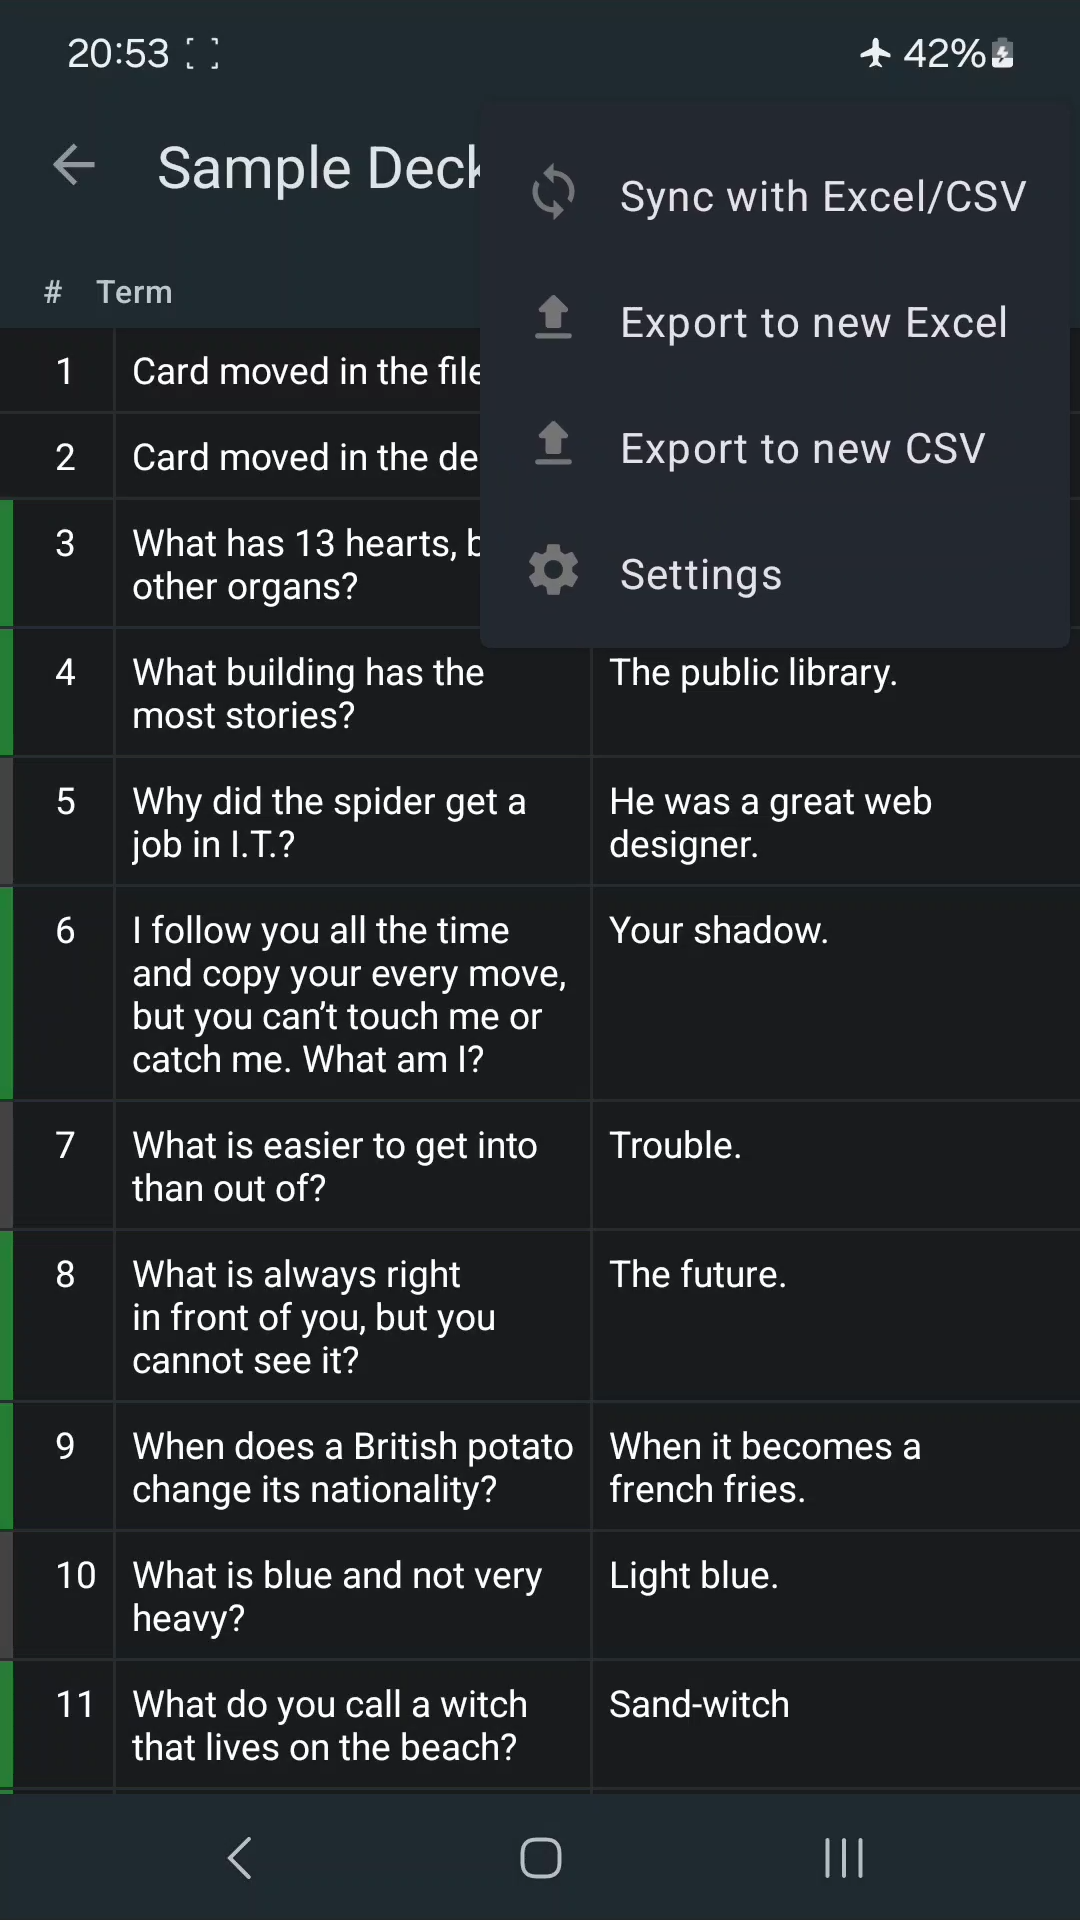
Edit cards more efficiently: Instead of editing cards one-by-one on your phone, you can sync with Excel or CSV files on your computer. Make bulk changes with find-replace, then sync back—without losing your study progress.
Create richer cards: Go beyond plain text with HTML formatting—add bold text, images, YouTube videos, and code syntax highlighting to make your cards more engaging.
Happy studying! 🎓